Portrait Lighting Tips in Photography |  |
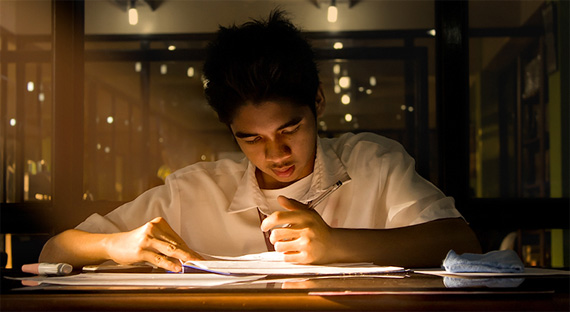
Posted: 26 Feb 2012 07:42 PM PST Lesson #1: Window LightingToday, with digital cameras, effective window lighting is a more realistic option for the photo enthusiast. Take your subject to a window, one without direct sunlight pouring in though – it’s too harsh! In the studio, pros position their ‘main light’ to the their left probably 90 percent of the time. So, find a window to your left with the reflected, or softer, light (as opposed to direct sunlight). "ojt" captured by Jan Michael Vincent V Castillo (Click Image to See More From Jan Michael Vincent Castillo) As you turn your subject more and more away from you, and therefore toward the window, the shadowing will change on his/her face. You’ll see the lighting you like the most and use it. After all, you are the artist now! For more refined results, see lesson #2 about reflectors. Advanced tip: Corner lighting – Find a window near the corner of a room with another window on the far wall. Although that second window cannot be ‘repositioned’ like a reflector (see below), it still can light the background and/or ‘fill in’ the shadow area of the portrait that you are creating. Lesson #2: Reflector LightingYou will need:
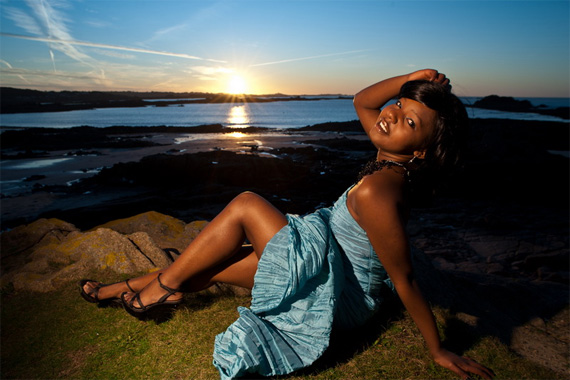
Or, a reflector can be as simple as aluminum foil (crinkled) attached to a piece of cardboard, use the dull side of the foil if sunlight is directly bouncing off of it. About 24″x 24″ works if you are mainly using it to photograph ‘head shots’ of your kids and others. The ’5 in 1′ is great though, because it has white, silver and gold surfaces to choose from. You can get softer, more diffused light off the white; more intense light off the silver; and warmer light off the gold. Positioning the Photo Reflector: Either a helper can tilt the reflector until pleasing light is thrown into the shadows of the portrait, or you can use a light stand w/clamp. Reflector lighting is more foolproof than strobe lighting, because one cannot overwhelm the natural, or ambient, light with the reflector light. And, by varying the distance of the reflector from the subject, the ratio of the highlights to the shadows can be controlled. You can flatten out the light, which is less flattering if weight or facial shape is not conducive, or, one can make the shadows darker, and, to a degree, one can vary the position of the shadowing by raising or lowering the reflector. Unlike strobe, you can actually see the light, so it is particularly easy to learn by experimentation. Remember, anywhere your camera goes, your reflector goes! Digital photography allows ‘trial and error’ photography to a degree not possible in the age of film. But, if certain elements are never present, they will never appear in any image, so this is among the key professional photography tips, in my view. For example, using a white or light gray (neutral) wall as a reflector. I photographed a model in front of the Monte Carlo casino in bright, (and I do mean bright!) Vegas sunshine, and got this glowing light, that usually only occurs by using reflectors, coupled with beautiful light in the hair. In this case, the distance from a wall on the right was perfect for bouncing light onto the model’s face and keeping it in the proper ratio with the sun light. Who says you can’t photograph into the sun! Also, photographing into the sun worked here because of an arch above her, that blocked sunlight from directly hitting the lens, which quickly wrecks photographs with something called flare. Employ some of these professional photography techniques, and you’ll feel like you don’t need to be in Photography 101 any longer! About the Author: Dan Burkholz has been a professional photographer for over a decade, creating images of thousands of subjects, and at over 300 weddings. For Further Training on Using Light in Portraits, PictureCorrect Suggests:Travel and documentary photographer Mitchell Kanashkevich has constructed an excellent eBook entitled Seeing the Light. It is made up of three sections which cover the use of a flash, a reflector and natural light. The full explanations, rich imagery, and detailed diagrams make this eBook very useful to any photographer who would like to use light more effectively. PictureCorrect readers can receive more than 15% off by entering the discount code picturecorrect before purchasing. It is currently available here: Seeing the Light eBook Go to full article: Portrait Lighting Tips in Photography Join the discussion of this article on facebook: PictureCorrect on Facebook Article from: PictureCorrect Photography Tips |
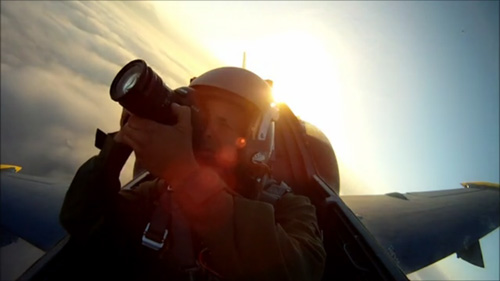
Posted: 26 Feb 2012 01:21 AM PST Every once in a rare while, a lucky photographer is asked to capture an assignment like this. Ed Darack was asked to shoot a cover photo for the The Smithsonian's Air & Space Magazine. Although a fascinating experience, it can also be extremely stressful and challenging with a lot of resources at stake due to the huge cost of making everything happen. Missing the shot is essentially not an option, take a look at the interesting process and how he has to fight against the g-forces to lean into the shot With so much at stake, Darack decided to first model his desired result in a 3D CAD program to formulate a plan ofwhat we wanted to capture exactly. After receiving a pre-flight physical and ejection seat training in the case of an emergency, Darack strapped himself into an f-16 holding his camera. When another aviation photographer, Justin De Rueck, takes to the skies, he is usually wielding his Canon 1D Mark IV. De Rueck says he works in Av or Tv and sticks with the same aperture until the light forces a change. By the looks of the video, being an honorary member of the aerobatic team is equally stunning and nauseating, as the photographer is forced to work through G-force, rapid twists, sharp turns, and at points flying upside down. Join De Rueck on a typical workday, here: During this assignment to photograph an L-39 aerobatic team over Cape Town, South Africa, he outfitted his camera with a Canon 24mm f/4 lens, later switching out to a 16-35mm, and strapped himself in for the ride of a lifetime.  Inside the Cockpit with an Aviation Photographer on Assignment Go to full article: Aviation Photography: How the Photos are Captured Join the discussion of this article on facebook: PictureCorrect on Facebook Article from: PictureCorrect Photography Tips |
Tags:
Photography Tips


0 comments:
Post a Comment