 |
- How to Sharpen Photos
- Adobe Photoshop Lightroom 4 Released Today
- Night Time-lapse Photography with Stars and Auroras
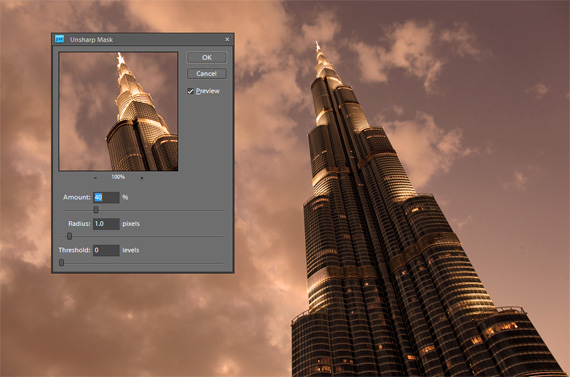
Posted: 06 Mar 2012 09:37 PM PST One thing to note about digital photos before we on… the picture format which you use. If you’ve set you digital camera to capture in JPEG format, it is likely you’ve encounter some loss of quality in the picture due to image compression. In this case, it does make sense to apply sharpening on the photo. If, however, you’ve selected to shoot in RAW mode, then you’ll unlikely face any image degradation – sharpening a RAW image isn’t necessary as often. 1. The Unsharp MaskThe Unsharp Mask tool is common in many photo editing software programs, including Adobe Photoshop Elements and Corel Paintshop Pro. Typically, when you apply the Unsharp Mask, you can control 3 factors – the Amount, Radius and Threshold:
2. Smart SharpenAnother tool at your disposal when sharpening photos is the Smart Sharpen tool. In Adobe Photoshop Elements, this tool is available as the Adjust Sharpness option within the Enhance Menu. Other photo editing programs (e.g. Corel Paintshop Pro) have similar tools but under different names.Typically, I’d make sure that I perform the sharpening step as the last step in the photo workflow. That means that I’ll clean up the image, adjust its color, tone, brightness, etc. and flatten the image before perform a sharpen. I find that ultimately yields a better looking image in the end. The nice thing about invoking smart sharpening tools is that all the settings have been built into the sharpening algorithm already – the program will select the most appropriate sharpening options for you. 3. Advanced Sharpening ToolsIf you’ve used Photoshop Lightroom or the Adobe Camera Raw plug-in for Photoshop, you’ll realize that these programs give you much more powerful photo sharpening toolkits. The algorithms for sharpening in Photoshop Lightroom and Photoshop far surpass what you see in simpler packages like Photoshop Elements and Corel Paintshop Pro. In fact, the tools in Photoshop Lightroom are so good that I’d highly recommend that you buy a copy if you’re a serious digital photographer.Also, here’s a little known secret about working in Photoshop Lightroom. Press down the Alt (PC) or Option (Mac) key as you adjust any of the sliders and the sharpening appears in black-and-white, which is much easier to see. If you’ve used Lightroom to some extent before, you’ll know this tip is a great help. There are dedicated photo sharpening tools out there. One of the programs I like a lot is the Nik Software Sharpener Pro. The sharpening algorithms in this package match those in Photoshop Lightroom and you can tell the difference in the sharpened image’s quality, as compared to those sharpened by more inferior programs. Helpful Video Tutorial:(for those of you reading this by email you can see the video here) Use the Unsharp Mask filter for complete control over your image’s sharpness. Remember to use Layer Masks! ConclusionIn summary, sharpening is a common procedure in photo workflows. However, to ensure that your sharpened image looks good – you should be sure what kind of sharpening settings you should apply – set these either manually or through a smart sharpening tool. If you’re a more advanced user, you should try using tools like Adobe Photoshop Lightroom, the Adobe Camera Raw plug-in for Photoshop, as well as the Nik Software Sharpener Pro – all of which have very good sharpening algorithms.So until next time, here’s wishing you luck in editing your photos! About the Author: Gary Hendricks runs a hobby site on digital photography. Visit his website at Basic-Digital-Photography.com for tips and tricks on buying digital cameras, as well as shooting great photos. For Further Training on Retouching Photos, PictureCorrect Suggests:Travel and documentary photographer Mitchell Kanashkevich has constructed an excellent eBook entitled Understanding Post-Processing. It is designed to teach you how to do professional yet subtle photo adjustments that really bring out the best attributes of any given photo. PictureCorrect readers can receive more than 15% off by entering the discount code picturecorrect before purchasing.It is currently available here: Understanding Post-Processing eBook Go to full article: How to Sharpen Photos What are your thoughts on this article? Join the discussion on Facebook or Google+ Article from: PictureCorrect Photography Tips |
Posted: 06 Mar 2012 03:14 PM PST Innovative Shadow and Highlight Recovery and Enhanced Digital Photography Workflows Mark A Milestone Release SAN JOSE, Calif. — March 6, 2012 — Adobe today announced the availability of Adobe Photoshop Lightroom 4 software for Mac OS and Windows. Lightroom is the essential digital photography workflow solution helping amateur and professional photographers quickly import, manage, enhance and showcase their images. Available at Amazon:First released as a public beta in January 2012, the final version of Lightroom 4 is now available for US$149 for the full version and US$79 for the upgrade, providing an incredible value for photographers. Lightroom 4 introduces refined technology for superior shadow and highlight processing, ability to create photo books, additional local adjustment controls, and enhanced video support."Feedback from our customers is invaluable in developing Lightroom and the real trick to a great release is to combine these insights with Adobe's unrivalled image processing innovation," said Winston Hendrickson, vice president products, Creative Media Solutions, Adobe. "Lightroom 4 is a stunning new release that will enhance photography workflows and help photographs stand out from the crowd." New Features in Lightroom 4Lightroom 4 is a major release, adding significant new capabilities and innovations. New adjustment controls maximize dynamic range from cameras, recovering exceptional shadow details and highlights. The software features new and improved auto adjustments to dynamically set values for exposure and contrast, and additional local adjustment controls including Noise Reduction, Moire and White Balance.Lightroom 4 provides photographers the tools to create beautiful photo books with text controls and a variety of easy-to-use templates, as well as a direct link for photo book creation from within the new Book module. A new intuitive Map module displays images already assigned a location, provides location tagging and reverse geo-tagging controls and saved locations for easy assignment of a photographer's common locations (for those of you reading this by email you can see the video here). Now, native video support gives photographers the capability to play, trim and extract frames from video clips shot on DSLRs, point-and-shoot cameras and smartphones. Video-specific presets and many standard Lightroom image adjustment controls can be applied to video clips, and adjusted videos can be exported as a H.264 file or published directly to Facebook or Flickr*. In the Develop module, presets fully utilize new processing technology and the addition of soft proofing helps photographers tune images in a destination color space to ensure content looks its best. In addition, customers can now email images directly from Lightroom using an email account of their choice. Pricing and AvailabilityAdobe Photoshop Lightroom 4 is now available for Mac and Windows at www.adobe.com/store. The estimated street price is US$149 for new users or US$79 for upgrades.Available at Amazon:Go to full article: Adobe Photoshop Lightroom 4 Released Today What are your thoughts on this article? Join the discussion on Facebook or Google+ Article from: PictureCorrect Photography Tips |
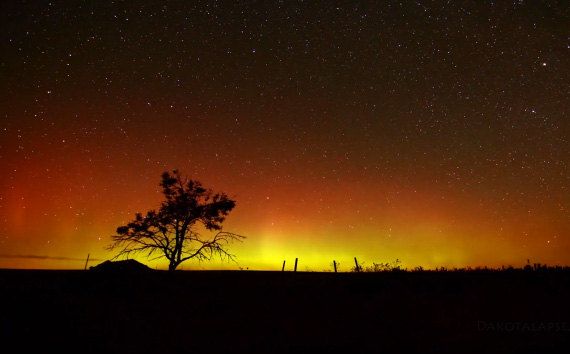
Posted: 06 Mar 2012 01:47 PM PST There have been quite a few timelapse videos making an appearance lately and Randy Halverson’s, Temporal Distortion, might just be one of my favorites. His timelapse takes us into remote areas in the United States and shows us what the night sky looks like sans light pollution. It’s magical and if you don’t believe me, have a look for yourself in the following video (for those of you reading this by email you can see the video here). Halverson notes that much of what we see in the video is not able to be seen by the naked eye. Halverson called on his Canon 5D Mark II and Canon 60D to capture thousands of images, with exposure times anywhere from 15 to 30 full seconds each. Using an aperture of 2.8, an ISO range of 1600-6400, and shot through Canon 16-35mm and Tokina 11-16mm lenses, Halverson spaced the individual images to be take at 3 second intervals. Each frame was shot in RAW. “In the opening “Dakotalapse” title shot, you see bands of red and green moving across the sky. After asking several Astronomers, they are possible noctilucent clouds, airglow or faint Aurora. I never got a definite answer to what it is. You can also see the red and green bands in other shots.”  Night Time-lapse Photography of the Stars Most of the scenes were shot near the White River in central South Dakota during September and October 2011, there are other shots from Arches National Park in Utah, and Canyon of the Ancients area of Colorado during June 2011. For Further Training on Star Photography & Timelapses:Check out Photographing the 4th Dimension: TIME; an instructional eBook that delves into the complicated techniques of night sky photography, slow shutter speed, time-lapses, and more. With 64 pages of well-designed information, it is definitely a valuable read and great reference on location.It can be found here: Photographing the 4th Dimension: TIME Go to full article: Night Time-lapse Photography with Stars and Auroras What are your thoughts on this article? Join the discussion on Facebook or Google+ Article from: PictureCorrect Photography Tips |
Tags:
Photo Editing


0 comments:
Post a Comment